Hardie board, also known as fiber cement siding, is renowned for its strength, resistance to the elements, and timeless aesthetic appeal. Installing Hardie board siding is a fantastic choice. 

But if you have doubts about how to install Hardie board siding then this guide will walk you through the step-by-step guide in a clear and simple way, from getting ready to finishing up. 

From the initial preparations to the finishing touches, we will provide you with clear instructions to ensure your siding installation is a success. So, roll up your sleeves, gather your tools, and let’s install a Hardie board in your home!

Material Need For Installing Hardie Board Siding

  • Hardie board siding
  • Starter strip
  • Corner trim
  • Window and door trim
  • Stainless steel or hot-dipped galvanized nails
  • Caulking
  • Pneumatic nail gun (optional)
  • Circular saw or table saw (with carbide-tipped blade)
  • Level
  • Chalk line

6 Easy Steps To Install Hardie Board Siding By Yourself

Installing Hardie board siding on your own doesn’t have to be hard at all. In fact, it’s surprisingly easy when you follow these straightforward guidelines.

  1. Prepare the wall – Remove any old siding or trim. Repair any damaged sheathing and insulate the wall, if necessary.
  2. Install the starter strip – The starter strip is a horizontal strip of siding that is installed at the bottom of the wall. It provides a base for the rest of the siding and helps to keep water out.
  3. Install the corner trim – The corner trim is installed at the inside and outside corners of the wall. It provides a finished look and helps to protect the siding from damage.
  4. Install the siding – Start at the bottom of the wall and work your way up. Overlap each piece of siding by 1/4 inch. Fasten the siding to the wall studs with stainless steel or hot-dipped galvanized nails.
  5. Install the window and door trim – The window and door trim is installed around the windows and doors. It provides a finished look and helps to seal out water.
  6. Caulk all the seams – Caulk all the seams between the siding, trim, and other openings in the wall. This will help to keep water out and protect the siding from damage.

Additional Tips to Make Your Siding Project Easier and Successful

  • Use a pneumatic nail gun to speed up the installation process.
  • Be sure to leave a 1/8-inch gap between the siding and the trim to allow for expansion and contraction.
  • Use a chalk line to mark a level line for the first course of siding.
  • Stagger the end joints of the siding to create a stronger and more attractive installation.
  • Cut the siding with a circular saw or a table saw. Be sure to use a carbide-tipped blade.
  • If you are installing the siding in cold weather, be sure to let the siding acclimate to the temperature for at least 24 hours before installing it.
  • If you are not comfortable installing Hardie board siding yourself, it is best to contact Active Exterior. Our expert team will help you to install Hardie board siding with professional hands.

Frequently Asked Questions (FAQs)

  • What should I do if I am not comfortable installing Hardie board siding myself?

If you are unsure, it’s best to contact professionals like Active Exterior to ensure a professional and reliable installation.

  • Why is corner trim used in Hardie board siding installation?

Corner trim is installed at both inside and outside corners to provide a finished appearance and protect the siding from damage.

  • How should I fasten the siding to the wall studs?

Use stainless steel or hot-dipped galvanized nails to secure the siding, starting from the bottom and overlapping each piece by 1/4 inch.

  • What is the purpose of window and door trim in the installation process?

Window and door trim provides a finished look around openings and helps seal out water.

  • How can I speed up the installation process?

Consider using a pneumatic nail gun for faster installation.

  • Why should I leave a gap between the siding and trim?

A 1/8-inch gap allows for expansion and contraction of the siding with temperature changes.

Conclusion

With the right materials and tools, you can install Hardie board siding by following our simple steps. Make sure to prep the wall first, use starter strips and trim, attach the siding, and seal the seams for a beautiful, weather-resistant finish. 

And if you ever feel that you are stuck while installing Hardie board siding, reach out to professionals like Active Exterior for expert help. So, don’t hesitate to Contact Active Exterior for professional assistance today!

Lots of people are curious about shiplap siding. It’s a type of siding you can use inside or outside your house. Shiplap gives a mix of old-fashioned and modern vibes, making your home more comfortable. In interior design, shiplap is a wooden wall style where long planks, often painted white, are put horizontally on the wall with a small space between them. It looks like the wooden walls on ships from the outside. But one downside is that these gaps can collect dust easily.

3 Ways to Utilize Shiplap Siding in Your Home

From the time when social media started increasing, people started following the trends and traditions shown in TV episodes. So, from that time, shiplap has become super trendy in home design. Lots of houses now have it, and it’s used in different ways. It comes in different styles for inside the home. Three of them are given below:

  1. Rustic-Style
  2. Cottage Style
  3. Farmhouse style

Rustic-Style:

Rustic style shiplap siding is an old-fashioned siding in which the wall is covered by wood, giving your home a comfy and aesthetic look. It’s made of long wooden planks with small gaps between them, like the walls in old cabins or cottages. This style of siding adds a warm and charming atmosphere to your house.

Cottage-style:

Cottage-style shiplap siding is a type of wooden wall covering that gives your home a charming and rustic look, like a comfortable environment inside the cottages you may find in developed cities. It’s made of long wooden planks with small gaps between them, similar to the walls of beautiful huts. This siding style adds a welcoming and unique feel to your house.

Farmhouse-style:

Farmhouse-style siding is a kind of outside wall covering that makes your home look like a classic farmhouse. It’s made of horizontal wooden boards with small gaps in between. These boards are usually painted white or left natural. This siding style gives your house a cozy, old-fashioned look, similar to the siding you’d see on traditional farmhouses. Many people like it because it makes their modern homes feel warm and nostalgic like they’re in the countryside.

Exterior Uses of Shiplap Siding

If you are looking for reliable siding for your home, shiplap is the best fit for exterior use. When there is a need for something strong and durable, people prefer to use Shiplap siding. Exterior uses of siding include the following:

  • Homes
  • Barns
  • Outbuildings

Is Shiplap Good for Interior Siding?

Yes, shiplap is good for interior siding. Not only does it give a beautiful look, but it is also highly durable.

Interior Uses of Shiplap Siding:

Shiplap isn’t only for the outside of buildings it gives the inside of homes a graceful look. Here are some ways people use shiplap inside their houses:

  • Accent Walls: You can put shiplap on one wall to make it the main focus of a room. It adds texture and makes the wall interesting to look at.
  • Ceilings: Shiplap on the ceiling can make a room feel cozy and rustic.
  • Wainscoting: Shiplap can be added to the lower part of walls to make them look pretty and protect them.
  • Backsplashes: In kitchens and bathrooms, shiplap can be used behind sinks and stoves to make those areas special.
  • Fireplace Surrounds: Shiplap can make a fireplace look amazing and stand out in a living room.
  • Cabinets: Some people even use shiplap to make their kitchen cabinets look more rustic and charming.

These are some ways people use shiplap inside their homes to make them feel warm and graceful.

Frequently Asked Questions (FAQs)

What is the cost of shiplap , and how does it compare to other siding options?

The cost of shiplap siding varies based on factors like material, labor, and location. It can be more expensive than some siding options but is often chosen for its unique look and durability.

What finishes and paint options are recommended for shiplap siding?

For a classic look, white paint is perfect. So, you can choose from a variety of paint colors and stains to match your preferred style. Semi-gloss or satin finishes are often used to make cleaning easy.

Can shiplap siding be used in wet or humid climates?

Shiplap siding can be used in wet or humid climates, but it’s important to use moisture-resistant materials and proper installation techniques to prevent moisture-related issues like rot or warping.

What are the advantages of using shiplap siding?

Shiplap siding is known for its durability, timeless aesthetics, and ability to provide insulation. It adds character and warmth to spaces and can be painted or stained to suit various styles.

Conclusion:

Shiplap siding is perfect for both interior and exterior design. Its durability makes it a favorite among homeowners looking to enhance the appearance and value of their homes. Whether you’re considering a cozy farmhouse-style interior or a cottage-like exterior, shiplap can transform your living spaces into warm and inviting sanctuaries. At Active Exterior, we specialize in providing high-quality siding installation and maintenance services. Our team of experts is dedicated to bringing your vision to life, ensuring that your shiplap siding project is executed with precision and excellence. Contact us today to discuss your siding needs, and let us help you create the home of your dreams. 

In Calgary, Alberta, the cost of roof replacement varies by material. Expect to pay around $5,400 to $9,000 for asphalt shingles, $7,858 to $14,412 for metal, $12,000 to $16,000 for wood & cedar and $22,200 to $37,000 for slate roofs.  

However, the final price depends on factors like roof size, materials, repairs, and labor. To get an exact estimate, it’s best to consult local roofing contractors. 

This article explores these factors to help you understand the cost of roof replacement in Calgary and make informed decisions for your project.

What Affects the Cost of a Roof Replacement?

The cost of a roof replacement will vary depending on a number of factors, including:

  • The size of your roof
  • The type of roofing material you choose
  • The complexity of your roof
  • The cost of labor in your area

Comparing Costs and Benefits of Roofing Materials in Calgary

No matter which roofing material you pick, hiring a qualified roofing contractor is the most important task. A good contractor helps you choose the right material for your needs and budget, and they ensure a proper, long-lasting installation. 

If you are in Calgary, consider reaching out to Active Exterior, who can provide you with the best assistance and expertise in roofing projects.

Asphalt Shingles

Asphalt shingles are a popular roofing choice due to their affordability. On average, you can expect to pay around $5,400 to $9,000 for a typical roof replacement in Calgary. 

While they are budget-friendly, asphalt shingles have a moderate lifespan of 20 to 30 years, making them a decent investment.

Benefits

  • Cost-effectiveness 
  • Ease of installation
  • Wide range of styles and colors are available

Metal Roofing

Metal roofing offers excellent longevity, with an average cost ranging from $7,858 to $14,412 in Calgary. When properly maintained, metal roofs can last 50 years or more, making them a durable choice that can save you money in the long run.

Benefits

  • Better Durability
  • Energy efficiency
  • Eco-Friendly

Tile Roofing

In Calgary, tile roofing can cost between $12,000 to $16,000. While it comes with a higher price tag, the aesthetics and curb appeal it adds to your home are undeniable.

Benefits

  • Beautiful Appearance 
  • Longevity often exceeding 50 years)
  • Resistance to fire and pests

Roof Replacement Cost Breakdown: Labor, Permits, and More

When you’re budgeting for a roofing project, the first part to consider is labor costs. If you hire professionals, you will pay for their labor, but if you choose the DIY route, you will save on labor costs and do the work yourself. 

How much you spend on labor depends on factors like how complicated the job is and the typical wages in your area.

Factors Influencing Labor Costs

Several elements impact labor expenses, such as the size of the roof, its pitch, any necessary repairs or modifications, and the chosen roofing material. 

Permits and Inspections

Local permits and inspections are essential aspects of the cost breakdown. The fees associated with obtaining permits and ensuring your roofing project complies with local regulations vary depending on your location. 

Local Regulations and Fees

Local regulations and fees in Calgary can significantly impact your project’s cost. Different regions may have specific codes and requirements that must be met during the roofing process. 

Frequently Asked Questions (FAQs)

  • Why are local permits and inspections important for a roofing project?

Permits and inspections ensure your project complies with local regulations and safety standards, preventing complications in the future.

  • How can I estimate labor costs for a roofing project?

Labor costs depend on factors like roof size, pitch, repairs, and chosen material. Obtain multiple quotes from roofing contractors for accurate estimates.

  • Why should I consider tile roofing despite its higher cost?

Tile roofing adds a beautiful appearance to your home, boosts longevity (often exceeding 50 years), and resists fire and pests.

  • Why is hiring a qualified roofing contractor important?

A qualified contractor like Active Exterior helps you choose the right material, ensures proper installation, and maximizes the longevity of your roof. For assistance in Calgary, consider reaching out to Active Exterior.

Conclusion

After understanding the cost factors and material options for roof replacement in Calgary, now you can make better and more reasonable decisions. Whether you are considering asphalt shingles, metal roofing, or tile roofing, a qualified contractor like Active Exterior can help you choose the right material and ensure a proper, long-lasting installation. 

Labor costs, permits, and local regulations also play pivotal roles in your roofing project’s budget. Feel free to contact Active Exterior for any assistance regarding roof replacement in Calgary.

The average cost for new siding is about $14,910 for a 2,500-square-foot house. But the price varies anywhere from $8,420 to $52,250. It depends on different factors but mostly on two main things that is the type of siding you pick as well as the shape of your house. Usually, each siding costs you around $10 per square foot of siding. But if you choose a really solid material like natural stone, it could cost you around $45 or even more for each square foot.

Siding Cost by Square Foot:

Putting new siding on your house usually costs about $10 for every square foot. But the exact price depends on what kind of siding you want. For example, vinyl siding per square foot usually costs you less compared to stone. The size of your house affects everything about getting new siding. The materials and the work are usually priced by the square foot. Even extra things like window flashing and insulation are priced this way. In some places, you might have to pay more for building permits if your house is bigger.

Siding Costs by Material

Cost depends on the kind of material you choose. The selection of material depends on the location of your house, looks, and how much the budget is. Different types of siding need different levels of care. The prices for these materials can vary based on quality, thickness, and design. Here are some examples of siding materials people often use.

Vinyl:

Vinyl siding is cheaper, it costs you about $5 to $11 for every square foot. You can make it look like bricks, wood, or stone, and you can put it on your house horizontally as well as vertically. It prevents moisture damage as well as keeps the bugs away, so you don’t need to do much to take care of it. But, even though it’s tough, by putting stress it can still break, bend, or melt.

Wood:

Wood siding is a traditional option, and it can cost you around $4 to $15 for each square foot. The price depends on the type of wood you choose. Some types, like redwood and cedar, are more durable and can be expensive.

If you are going to install wood siding, you can make it safe by sealing, painting, and treating it timely. It can cause bugs to enter and might warp or crack over time, but the good news is that it’s relatively simple to fix compared to other siding materials.

Fiber Cement:

Fiber cement siding costs you around $5 and $10 per square foot. It’s made from a mix of sand and cardboard, but it looks like real wood. The great thing about it is that it’s tough – it can stand up to moisture, bugs, rot, bad weather, and even fire.

You can paint it as you like and give it your own style. Just remember, it’s a bit heavier and might take more time to put up compared to some other siding options.

Stucco:

Stucco is a special type of siding that needs a professional’s help to put it up correctly. It costs you around $8 and $13 per square foot. It is prepared from a mixture of sand, cement, or lime, and it gives your home a strong, textured look. If the installation is done in a proper way, it won’t easily crack or break. But if it’s not installed well, it can get damaged within no time. So, make sure to hire a pro if you go with stucco.

Brick:

Brick siding gives your home an aesthetic look, and it can cost you around $8 to $21 per square foot. The price depends on the color as well as the arrangements of bricks on your house. But, in really hot places, it can create a warmer environment, which might not be what you want.

Installation cost:

The cost of hiring a professional for siding installation is around $1.50 and $4.50 for every square foot of siding, on top of what you pay for the materials. The price can change depending on location and how big or tricky the job is. Instead of a square foot rate, some contractors charge per hour, which is usually between $40 and $90.

Signs That You Need to Install New Siding

There are some signs from which you may get to know that it’s time to install new siding at your home. These signs include the following:

  • Cracks or gaps: If you see these, it might mean there’s moisture getting in.
  • Holes: Little animals or bugs could be making holes in your siding.
  • Paint bubbles: When paint bubbles, it could mean water is getting in. Fix any water problems before repainting.
  • Sagging: If your siding is drooping, it means the screws, nails, or strips holding it up might be failing.
  • Color changes: Too much sun exposure can make the colors fade and weaken the siding.
  • Hail damage: After a big storm with hail, there are chances of dents and cracks in your siding. Check timely.
  • Water damage: Water hiding behind your siding can lead to mold and even damage the structure of your house.
  • Higher energy bills: If your utility bills are going up, it might mean your siding isn’t keeping your home well insulated.

Frequently Asked Questions (FAQs)

Is a moisture or vapor barrier necessary?

You only need a moisture or vapor barrier in specific places in your home. To prevent water getting in and causing mold to grow, your contractor might suggest taking off your siding and putting in a barrier between the wall and the siding.

Do siding costs vary by location?

Yes, the cost of siding depends on the location. Depending on the weather conditions the material used for siding is different so is the cost. So, if you are living in a place where the weather is colder, vinyl siding fits best and is cheaper than others. But in hotter places where it might get damaged in extreme heat, it can be harder to find and more expensive.

What is the most affordable way to side a house?

If you want to side your house without spending too much money, vinyl siding is usually the cheapest option. It’s not only budget-friendly but installation is also easy. Even though some other materials might seem cheaper at first, the fact that vinyl needs very little maintenance makes it a smart choice for homeowners looking to save money.

Conclusion:

At Active Exterior, we understand that choosing the right siding for your home is an important decision, and cost is a significant factor. Our commitment is to provide you with top-quality siding solutions that not only enhance the beauty of your home but also fit your budget.

Ready to transform your home’s exterior? Contact Active Exterior today for a free consultation and estimate. Let’s work together to find the perfect siding option that combines affordability and durability, giving your home the look and protection it deserves. Your dream home exterior is just a call away!

In Calgary, the average life expectancy of your roof depends on several factors. Typically, asphalt shingle roofs, the local standard, can last for about 15 to 20 years. However, this durability is influenced by factors like the quality of materials, how well it’s installed, and maintenance.

With its harsh winters and temperature swings, timely maintenance is really important to maintain the roof’s longevity. The good news is that if you opt for different roofing materials, such as metal roofs, you can enjoy a roof that lasts well over 50 years.  

In this article, you will also get an answer to how long a 30-year roof really lasts and what affects its longevity. So, when you are thinking about your roof’s longevity in Calgary, your choice of material, proper installation, and maintenance plays a  very important role in ensuring the durability of your roof.

What Makes Your Calgary Roof Last Longer

Calgary’s tough weather can really wear down your roof. Hot summers, cold winters with heavy snow, and strong winds all year can shorten how long your roof lasts. 

But there are things you can do to make your roof last longer and keep your home safe from the weather. The few best things that help your roof last longer in Calgary are:

  • Roof Installation:

    How well your roof is put in makes a big difference. If it’s not done right, it can leak and have problems that make it wear out faster. Always get a good roofer to do the job, or you can consult with Active Exterior for any kind of roofing queries and guides.

  • Maintenance:

    It is recommended to do proper maintenance after a 2-3 months gap, but in winter, you need to maintain your roofs frequently. Regular roof check-ups can find and fix problems before they get bad. Have a roofer check your roof at least once a year.

  • Ice Dams:

    Ice dams are those ice ridges that form on your roof’s edge. They can block water from draining properly and cause leaks. To stop ice dams, make sure your roof has good ventilation and insulation.

Additional Things To Consider To Enhance The Longevity of Roofs

  • Roofing Materials: What your roof is made of matters. Some materials, like metal roofing, last longer in Calgary’s tough weather than others, like asphalt shingles. Pick materials that can handle Calgary’s weather.
  • Roof Flashing: Roof flashing is a metal material that seals around openings like vents and chimneys. It’s important to have it done right to keep water out and prevent leaks.
  • Roof Slope: The steeper your roof, the better it sheds water and snow. This can help your roof last longer.
  • Roof Underlayment: Roof underlayment is a water-resistant layer under your shingles or roofing materials. It keeps your roof safe from leaks and moisture damage.

7 Key Indicators for Roof Replacement in Calgary

When it comes to knowing when it’s time for a roof replacement, there’s no one-size-fits-all answer. Your roof’s lifespan is influenced by multiple factors, including its history, age, and exposure to the elements – from storms and rain to relentless wind and snow. To ensure your home remains protected, here are essential signs to watch for:

  • Check for Wear and Tear

Periodically inspect your shingles for missing granules. These granules protect your shingles from the elements. When they start to wear away, it’s a sign of wear and tear, which can make your roof less effective at shielding your home from rain, hail, and UV rays. This could lead to water damage and shorten your roof’s lifespan.

  • Moisture Problems

Moss might seem harmless, but it’s a visible clue that your roof could be facing moisture-related issues. Moss thrives in damp environments, suggesting that your roof may be holding onto moisture. 

  • Ventilation Condition

Proper ventilation is essential for your roof’s health. A well-functioning ventilation system regulates temperature and humidity in your attic. If your ventilation isn’t working correctly, it can result in moisture buildup. Excess moisture in your attic can lead to mold and rot, which can compromise your roof’s integrity and indoor air quality.

  • Curling Shingles

When shingles curl or buckle, it’s a clear sign of trouble. Curled shingles lose their ability to protect your home effectively. They may allow water to seep beneath them, causing leaks and water damage. Addressing curled shingles promptly is vital to maintaining your roof’s performance and longevity.

  • Structural Integrity

Roof sagging is a significant concern. It’s a visible sign that your roof’s structure may be compromised. Sagging may result from issues with the roof decking, supports or a buildup of heavy snow. It can lead to more significant structural problems, making it crucial to have it inspected and repaired promptly.

  • Missing Shingles

They expose your roof’s underlayment and your home’s interior to the elements, increasing the risk of water infiltration. Water damage can be expensive to fix, so it’s essential to replace missing shingles promptly to maintain your roof’s protective barrier.

  • Expected Lifespan

Roofs have a finite lifespan, and as they get older, they become more susceptible to wear and tear. Keeping an eye on an aging roof is essential to catch any issues early and ensure it continues to protect your home effectively.

Frequently Asked Questions (FAQs)

  • How Does the Calgary Climate Impact Roof Durability? 

Calgary experiences harsh weather conditions, including hot summers, cold winters with heavy snow, and strong winds year-round. These elements can accelerate wear and tear on your roof, making it crucial to select durable roofing materials and practice routine maintenance.

  • Can Proper Roof Installation Extend the Lifespan of My Roof? 

Yes, professional roof installation is essential for maximizing your roof’s longevity. Proper installation ensures that your roof can withstand the challenging Calgary climate and minimizes the risk of issues that could shorten its lifespan.

  • How Important Is Roof Maintenance for Roof Longevity in Calgary? 

Regular roof maintenance plays a significant role in prolonging your roof’s lifespan. It allows for the early detection and resolution of potential problems, ensuring that your roof remains in optimal condition to protect your home.

  • Are There Additional Measures to Enhance Roof Longevity in Calgary? 

Yes, in addition to material choice, installation quality, and maintenance, factors like addressing ice dams, maintaining proper ventilation and insulation and ensuring adequate roof slopes can all contribute to extending the lifespan of your roof in Calgary.

Conclusion

Ensuring the longevity of your roof in Calgary is a core thing to protect your home from the weather. Timely maintenance, choosing the right materials, and proper installation are key factors. 

To keep your roof in the best shape, consult experts like Active Exterior for guidance and solutions. Your roof is an investment that secures your home, and with the right care, it can stand strong against Calgary’s ever-changing climate. For any assistance or roofing queries, contact Active Exterior today to protect and maintain your roof for years to come.


Qualities like durability and longevity are the most important factors to keep in mind when replacing a roof for your house. Roof replacement is necessary with the passage of time after about 30 to 75 years, your roof might get really messed up, and you might need to get a whole new one. This can cost you around $6,700 to $80,000, but for a regular-sized house, it’s around $11,500. Here, the question that arises in mind is: Why such a big range in costs? Well, it depends on your choice and the quality of the roof, as cost depends on quality.

Top 2 Factors That Affect Roof Cost

The main things that affect how much it costs to replace your roof are the materials used and how your roof is designed. For example, most roofs are between 1,000 and 3,000 square feet, and you can choose from materials like asphalt shingles, aluminum, clay, or copper for your roof.

Roofing materials are measured in different units or forms, like per square foot, per bundle, or per roofing square (which is like a ten ft. by 10 ft. chunk of materials). The material will not cost you much, but the maximum cost you have to pay to the person who is doing the work for replacement. 

Roofing Costs and Considerations

  • Roofing Cost per Square Foot:

Getting a new roof can cost you anywhere from $4 to $40 per square foot, with the average being around $7 per square foot. This means that for a typical roof, it’s about $400 to $4,000 per roofing square, or roughly $700 if you’re using the most common materials.

Making a final decision regarding the size of your roof can be a bit difficult if you don’t have proper plans. The slope and shape of your roof, like whether it’s hipped, gabled, or flat, determine how many shingles, shakes, or tiles you’ll need. In the end, it’s usually best to ask a professional to come and measure your roof to get the exact size.

  • Labor:

Make sure to hire a professional for roof replacement. They will not only repair or replace your roof, but they will suggest the best designs for your home. Labor cost is approx. $2 and $7 per square foot on average. It may increase or decrease depending on the design of the roof or if the installation is tough, like if the roof is really steep or if it’s hard to reach certain spots. Prices vary from place to place as well. It can cost you more if you are living in a place where everything costs more as compared to other places. Your contractor may charge between $40 and $60 per hour for the work, but flat-rate estimates are more common for large projects like these.

  • Materials:

The other 40% to 50% of total roof replacement costs depends on the material used. The material used for roofing purpose include the following: 

  • Shingles
  • Shakes
  • Tiles etc.

You’ll also contribute to the cost of building supplies such as nails, tools, ladders and other related equipment.

  • Roof Pitch:

The slope of your roof affects square footage as well as the labor cost for roof replacement. For one, the higher the pitch, the larger the area. While most roofs fall between a 3:12 and 6:12 ratio, steeper roofs will require special tools for installation and take longer to install.

Full vs. Partial Roof Replacement Costs

Sometimes, there is no need to replace the whole roof. If just one part got damaged, like in a storm, or if only one section is worn out on a multi-level roof, you can save money by repairing that specific part.

But if your roof is really old and doesn’t meet the rules anymore, or if you want it to look the same all over and stay strong, it’s probably best to replace the whole thing.

Frequently Asked Questions (FAQs)

Should I repair my roof on my own or hire a professional?

If you think you can do it yourself and you are not afraid of heights, make sure you have proper tools. You can do small roof fixes, like stopping leaks yourself. But try to hire a professional if you are planning to replace the roof. 

What is the best type of roofing material for hot climates?

If you’re living in a place where the weather conditions are too hot, it’s best to have a roof made of metal, clay, or stone. These roofs can handle the heat, and some metal roofs can even bounce the sun’s heat away, which can make your home energy-efficient.

How often should a roof be replaced?

The longevity of a roof depends on the material used as well as the location where you live, and how well you do maintenance. 

  • Roofs made up of asphalt shingles and wooden shakes usually stick around for about 30 years.
  • Roofs made up of metal can last up to 70 years!

Conclusion:

Ready to do roof replacement? Choose a material that is durable and ensures longevity, as there are some pros and cons of each type of material. Active Exterior can better help you in selecting the best option for your home. One thing to keep in mind is that the costs can vary based on your location and the type of material you use, but do not worry; we can help you navigate these factors. Take the first step toward a more comfortable and energy-efficient home. Contact Active Exterior today to get started!

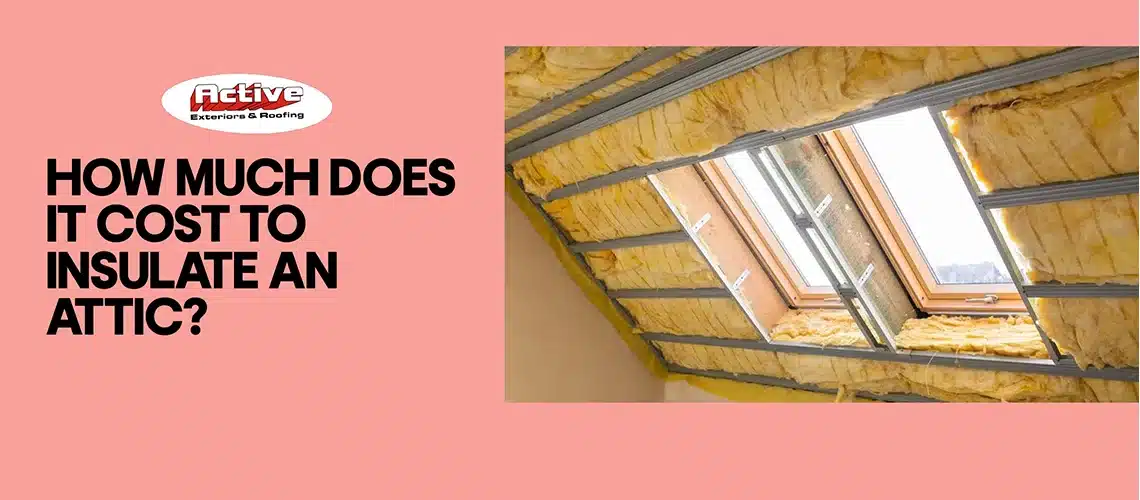
When it comes to the cost of insulating an attic, you might be wondering, ‘How much does it cost to insulate an attic?’ Well, the estimated expense typically falls within the range of $1,680 to $3,125. However, this cost can vary depending on the size of your attic and the specific insulation material you opt for.

The average amount noticed was about $2,380, which was spent by the homeowners. This amount includes everything like the insulation materials as well as installation by a professional. 

Effective Strategies for Home Energy Savings

According to the U.S. Environmental Protection Agency, you can save energy costs at home by attic insulation. The estimated energy cost you can save by adding insulation in the attic is about 15% on heating and 11% on cooling. 

But you can expect to save more energy costs, like 20%, if you are living in a Climate zone like in continental climate zone. Planning to insulate an attic but at a reasonable cost? Our pricing guide can help you find the most affordable options for insulating your attic, along with a DIY installation guide. 

Comparing Attic Insulation Costs: Finding the Best Deal

Just like other jobs we do to improve our home, the same is the case with attic insulation. However, the average cost to insulate an attic is different for each attic, depending on the size and material of the attic. 

One thing to keep in mind while planning attic insulation at your home is that the cost of an attic varies from community to community as well. The amount you will pay for attic insulation will include the material cost as well as the cost of labor to install this insulation. The price estimation is given below:

Cost Estimation:

Average Cost $2500
Highest Cost $3500
Lowest Cost $1500

4 Best Cost-Effective Attic Insulation Types

There are many types of attic insulation materials to choose from. Different materials are used in the attic insulation. You will discover details about each attic insulation material and how much it costs per square foot. This info will make it easier for you to pick the best insulation material for your attic.

  • Blown-In Insulation
  • Batt Insulation
  • Spray Foam Insulation
  • Structural Insulated Panels
  • Blown-In Insulation

With the help of a long hose connected to a machine, it is blown into your attic. That is why this insulation is given the name Blown-In Insulation. You can get professional help or get a machine on rent for a day. 

The best thing about this insulation is that it can go into small, difficult-to-reach places and tricky corners easily, but it might sink over time. Sometimes, there is a need to make a small hole in your house for the installation of insulation, but you need not worry about it; we’ll solve this issue by using similar material.

There are three main types of blown-in insulation. You can choose one of them depending on your choice or preferences. Also, you can get help with the Energy Star map for picking the best type that suits your local climate. The three types of Blown-in-insulation are:

Fiberglass, Cellulose, and Rock Wool Attic Insulation Costs

  • Fiberglass:

    If you are looking for an attic that is budget-friendly and that suits your climate, you can go for fiberglass attic insulation as it only costs you around $0.40 per square foot or $190 in material costs for a 500-square foot attic.

  • Cellulose:

    If you are planning for insulation from old newspaper and cardboard, you can go for Cellulose insulation. As, It costs you around 33 cents per square foot, for a 500-square-foot attic, you have to pay just $160 for the material.

  • Rock Wool:

    Rock wool has a dense consistency, just like sheep’s wool, but this blown-in insulation is expensive but valuable. You have to pay around $1,200, or $2.40 per square foot, for a 500-square-foot attic.

  • Batt Insulation

If you are Looking for something budget-friendly as well as easy to install, you can go for Batt Insulation, as it works well in the attic. If you are planning to install insulation on your own, batt insulation is the best choice. 

These are available in the market in the form of rolls and installed in strips that can be cut to fit small spaces. As this insulation is budget-friendly, this only costs you around $2 to $4 per square foot.

  • Spray Foam Insulation:

This type of insulation is just like blown insulation; the only difference that it has is in the material. This insulation is not made up of bits of material but of foam, that is why it has been given the name Spray foam insulation. The insulation works well even for the tiniest corners and spaces. 

Your temperature can be controlled in a better way using this type of insulation. This type of insulation is a bit more expensive than other types of insulation. For this type of insulation, you have to pay around $3 to $5 per square foot.

  • Structural Insulated Panels:

If you’re building a new house, Structural Insulated Panels (SIPs) are a great choice. But if you’re just looking to replace insulation without major renovations, SIPs may not be the right fit for you. Using SIPs might require more extensive work, like removing wood paneling, which could be a bigger project than you need.

But when it comes to the price per square foot simply for structural insulated panel materials, you might be looking for $4 to $7.

Top 3 Benefits of Insulating Your Attic

Insulating your attic has some great advantages that can make your home better. Here are a few of them:

  • Saves Energy: Attic insulation helps keep your home warmer in winter and cooler in summer. This means you use less electricity or gas, which can save you money.
  • Cleaner Air: Insulation also keeps the air inside your home cleaner. It stops dirt and bad stuff from getting in. It also prevents mold and dampness, which can be bad for your health.
  • More Even Temperature: Insulation makes sure your home stays at a comfortable temperature all the time. It doesn’t get too hot in summer or too cold in winter, so you feel cozy.

Frequently Asked Questions (FAQs)

  • How long does it take to insulate an attic?

The time required to insulate an attic is around 7-8 hours.

  • Do I need to air-seal my attic before installing insulation?

Yes, there is a need to air-seal the attic before installing insulation to make it energy-efficient. 

  • Should I DIY or hire a professional?

It depends on the type of insulation you are going to install. Like if you are planning to install batt insulation, you can easily do it yourself, but if you are planning to blow in or spray foam insulation, then you will need professional help. 

Conclusion

Ready to improve your attic insulation? Choose one type of attic that best suits your budget and needs and go for the installation process. There are some pros and cons to each type of attic. Active Exterior can better help you in selecting the best option for your home. 

One thing to keep in mind is that the costs can vary based on your location and the insulation type, but do not worry, we can help you navigate these factors. Take the first step toward a more comfortable and energy-efficient home. Contact Active Exterior today to get started!

The material used to cover the outside of your home isn’t just for looks. Some of it does a better job at keeping your home safe and ensures a comfortable inside environment. One of the major questions is whether aluminum siding is better than vinyl siding. 

If you live in the Midwest, you need siding that can handle extreme weather conditions. You want a siding that stays long and makes your home look nice. Here are the two choices for you: aluminum and vinyl siding. This article will help you decide which one is best for your home by knowing the pros and cons of each.

Aluminum vs Vinyl Siding: Durability

When it comes to the material that covers the outside of your home, you want it to be durable. You don’t want your house to look old and worn out because the siding isn’t holding up. Now, both aluminum and vinyl siding are durable, but when you look at each and every aspect of both, vinyl siding comes out on top. Both kinds of siding can handle extreme weather as well as wear and tear, but aluminum siding can easily get dents and scratches. Vinyl siding, on the other hand, is much stronger, and it’s often twice as thick as aluminum.

Aluminum vs Vinyl Siding: Affordability

When it comes to the cost, there’s not much difference between aluminum and vinyl siding. Aluminum is a bit cheaper, but there’s something important to keep in mind. You see, vinyl siding is better when it comes to the value it adds to your home. It can make your home worth more when you want to sell it, unlike aluminum, which can make your home’s value go down because it’s easier to damage.

So, if you’re thinking about what you pay right away, aluminum might seem like the better choice. But if you are looking for longevity and durability, vinyl siding is the smarter investment because it can make your home more valuable.

Aluminum vs Vinyl Siding: Energy Efficiency

When it comes to saving energy and keeping your home comfortable, the siding you pick is super important. Your siding should help trap the warm or cool air inside, so you don’t have to crank up the heater or air conditioner. Without thinking, go for Vinyl siding, as Aluminum siding doesn’t do so well in extreme weather. It soaks up heat in the summer, making the inside environment of your home hot. That means you’ll need the AC working overtime. Also, since aluminum isn’t as durable as vinyl, it’s more likely to get damaged. That can lead to cracks, leaks, and holes, making your home less energy efficient.

Vinyl siding doesn’t have these problems. It won’t crack, warp, or rot, and it keeps pesky rodents away from getting inside. At Active Exterior, we offer some of the most energy-efficient vinyl siding around. It’s got a special thermal support system that wraps around your home like a warm blanket. Plus, our siding has a backing system that makes it four times better at holding in heat than regular siding. That can make your home energy-efficient by saving up to 20% on energy bills. 

Aluminum vs Vinyl Siding: Maintenance

When it comes to taking care of your siding, you want something that won’t make you spend a lot of time or money on repairs. In this case, choose vinyl siding without thinking. Aluminum siding can easily get dented or scratched, which means you might have to fix or replace it if it gets damaged.

Also, aluminum siding gets faded over time and needs repainting every so often. Vinyl siding, on the other hand, never fades because the colors are baked in when it’s made. This means it’ll keep looking great for a long time without any extra work. The only thing you’ll need to do for vinyl siding is give it a good cleaning once in a while. Other than that, you can be confident that your home will stay beautiful with vinyl siding.

Aluminum vs Vinyl Siding: Variety

When you’re thinking about getting new siding for your home, you might want to keep the same look or give your home an updated look. Now, aluminum siding has come a long way, but it still looks metallic. But with vinyl siding, there are many choices. You can go for the standard look, or you can pick something like Dutch lap, vertical, scalloped, and more. You can even choose a shake-style siding that makes your home look like it has wooden siding without the downsides. So, when it comes to the way your siding looks, vinyl siding offers more options. It’s the better choice between aluminum and vinyl siding. You can find something that matches your home’s style and makes it look even better.

Frequently Asked Questions (FAQs):

Does one of these siding options offer better energy efficiency? 

Yes, vinyl siding is generally better at energy efficiency. It provides better insulation, helping to maintain a consistent temperature inside your home and reducing the need for excessive heating or cooling.

Which siding option is more durable? 

Vinyl siding tends to be more durable than aluminum. Vinyl is less prone to impact damage and is not rust-resistant. It also holds up better in extreme weather conditions.

What are the primary differences between aluminum and vinyl siding? 

The main differences lie in their material composition and characteristics. Aluminum siding is made of metal, while vinyl siding is made of plastic. Vinyl is known for its durability, energy efficiency, and variety of styles, whereas aluminum is lighter but more susceptible to dents and scratches.

Conclusion:

“Vinyl vs. Aluminum Siding: Why Vinyl Takes the Lead”

When we compare vinyl siding to aluminum siding, vinyl comes out on top in almost every way. It’s stronger, better at saving energy, more accessible, and offers more choices. And when you think about the cost, vinyl still comes out ahead because it saves you money. After all, it is more durable.

When it’s time to get new siding, choose Active Exterior. We’ve been helping people in the Midwest for years and offer the most energy-efficient and good-looking vinyl siding. Also, we’ll ensure professionals install your vinyl siding to ensure it fits your home. Contact us now for your vinyl siding replacement project.

In Calgary, having a strong and visually appealing roof for your home is not only a trend, but also it is important for being environmentally friendly. It provides protection from the hazardous elements and ensures your home remains cozy and dry in all seasons. 

Additionally, over time, even the sturdiest roofs may sustain damage and need replacement. In this article, we will break down How Much it Costs to Replace a Roof, how you can save money while replacing a roof, and much more. Let’s get into further details!

Average Cost to Replace a Roof in Calgary

The cost of replacing a roof in Calgary can vary widely, depending on several factors such as the size of your home, the type of roof you prefer, and the complexity of the job. 

On average, you can spend approximately $11,500 for a complete roof replacement. However, this cost can range from $6,700 for simpler projects to as high as $80,000 for larger or more complex structure roofs.

3 Signs Your Roof Needs to be Replaced

There are multiple ways to figure out if it’s time for a new roof, so you can keep your home safe and dry. The following 3 signs will give you an idea of when you need to replace the roof.

  1. Roof Life Cycle Assessment

    Think of this as checking your roof’s overall health. Consider its age, the materials it’s made of, and how well it’s been maintained. If it’s getting old or hasn’t been taken care of, it might be time for a replacement.

  2. Infrared Inspection for Hidden Damage

    Sometimes, roof problems aren’t easy to see. Infrared inspection uses special technology to find hidden issues like leaks or trapped moisture. It helps catch problems early, so you can decide if a replacement is needed before things get worse.

  3. Water Damage Severity Assessment

    Water damage is a big warning sign. Check for things like sagging ceilings, mold, or major leaks. The worse the water damage, the more urgent it is to replace your roof.

Factors Affect the Roof Replacement Cost

The cost of replacing your roof in Calgary can vary based on factors like materials, roof style, and labor. The details of these factors are:

  • Roofing Materials and Style:

    When it comes to your roof, what you pick for materials and the style you want can make a big difference in the price. Roofs come in different sizes, usually between 1,000 to 3,000 square feet. You have options like asphalt shingles, aluminum, clay, or copper roofing materials to choose from.

  • Pricing Breakdown:

    The cost of roof replacement boils down to two primary factors: materials and labor. Roofing materials may be priced per square foot, bundled, or by roofing square (a 10 ft by 10 ft section of materials). It’s important to note that labor expenses can make up a substantial portion, sometimes as much as 60%, of the total cost.

Frequently Asked Questions (FAQs)

  • Are building permits required for roof replacement in Calgary? 

Yes, in most cases, you will need a building permit for roof replacement in Calgary. The requirements can vary based on the scope of work and local regulations. It’s advisable to check with the City of Calgary or a local authority to ensure compliance with permit requirements.

  • What is the expected lifespan of different roofing materials commonly used in Calgary? 

The lifespan of roofing materials can vary significantly. Here are some approximate lifespans:

  • Asphalt shingles: 20 to 25 years
  • Metal roofing: 40 to 70 years
  • Clay or concrete tiles: 50 to 100 years
  • Cedar shake shingles: 20 to 35 years
  • How can I ensure that my new roof in Calgary is energy-efficient and complies with local building codes? 

To ensure an energy-efficient and code-compliant roof, consider the following:

  • Choose roofing materials with high energy efficiency ratings.
  • Ensure proper insulation and ventilation in your attic space.
  • Consult local building codes and regulations to meet energy efficiency standards, particularly in a climate like Calgary’s.

Conclusion

Now you get a detailed understanding of How Much it Costs to Replace a Roof and how you can save your money while replacing the roof. In Calgary, replacement costs vary, averaging $6,700 for simpler projects and up to $80,000 for larger or complex roofs. Watch for signs like roof health, hidden damage, and water damage to decide when it’s time for replacement. 

For further information and assistance with your roofing project in Calgary, reach out to Active Exterior. We are here to address your roofing needs and ensure your home remains safe, comfortable, and stylish. Contact Active Exterior for Your Roofing Needs!

It’s time to say Hello to spring, as winter in Canada is almost over. The days are not far when the snow on the roof of your houses will start melting, and you’ll need something to collect that water and move it away from your home to prevent any damage. 

Eavestrough with downspouts will help you prevent your home from damage. If you’re not familiar with these important parts of your home’s exterior, this article is perfect for you to learn more.

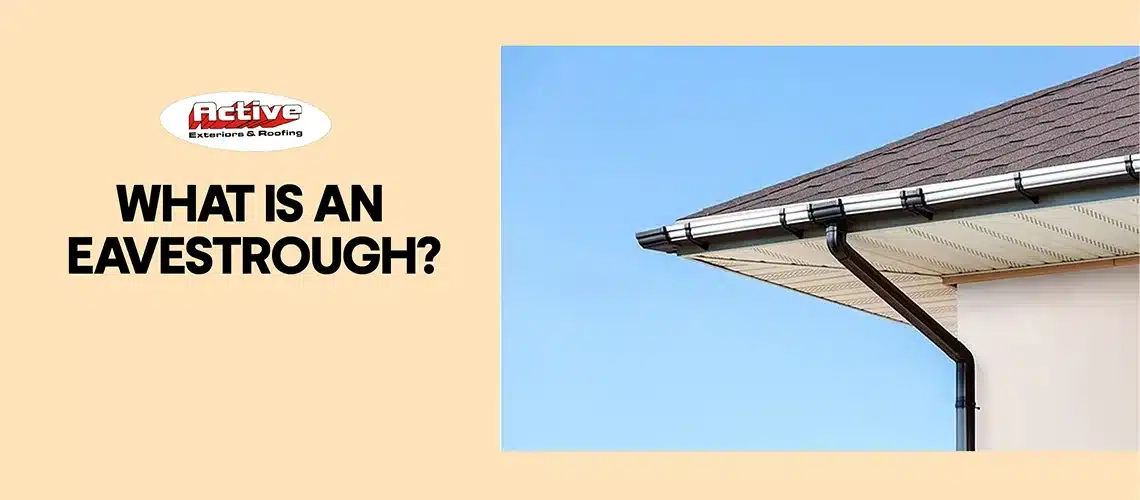
Different names are used for an eavestrough, as it is also known as a rain gutter, roof gutter, or water channel. If we talk about the structure of the eavestrough it is like a long, narrow trough that goes around the edge of your house’s roof. 

The purpose of this is to collect rainwater or melted snow from the roof and carry it away. The pipes that are used for the drainage of water are called downspouts or downpipes, as these pipes take the water to a drainage system.

What Makes Up Your Gutter System?

Let’s take a closer look at the different components that make up an eavestrough system:

  • Eavestrough: These are basically the channels that are used to catch water from the roof.
  • Downspouts: Downspouts are the pipes used to catch water from the roof to the ground.
  • Soffit: The bottom part of the roof overhang is termed as Soffit.
  • Fascia: It’s a horizontal board where the gutters are attached.
  • Gutter Guards: Just like filters, gutter guard works as these are used to stop leaves and other things from entering to prevent any blockage. 

What Eavestrough Options Best Match Your Home?

There is a long list of eavestroughs that are available in the market. You can classify eavestroughs on the basis of both the shapes of eavestroughs as well as the material used. 

By Shape:

  • K-Style: These eavestroughs have flat bottoms and backs, looking neat and modern.
  • Half-round: They are like a semi-circle, giving a classic, rounded appearance.
  • Leaf Barriers: These types of eavestroughs have a protective hood and curved lip that stop leaves and debris from clogging the system, ensuring smooth water flow.

By Materials:

  • Aluminum: Light and resistant to rust, aluminum eavestroughs are strong and affordable.
  • Copper: Known for their classy look, copper eavestroughs develop a special patina as they age.
  • Zinc: Durable and environmentally friendly, zinc eavestroughs are low-maintenance and have a unique, matte finish.
  • Steel: Sturdy and available in various styles, steel eavestroughs can withstand tough weather.
  • Vinyl: Lightweight and cost-effective, vinyl eavestroughs are easy to install and take care of.

The 4 Best Benefits of Eavestrough

Well, there are multiple benefits of using Eavestrough, but the top 4 benefits of Eavestrough are:

1. Effective Drainage System

Consider a situation in which your home is without eavestroughs. During rain or snowmelt, water simply runs off the roof, creating messy splashes and detracting from your home’s appearance. The force of this water might even wash away soil, potentially causing damage to your basement.

However, with a functional eavestrough system, it channels rainwater and melted snow in a controlled manner through downspouts. This prevents a dirty appearance and safeguards your home from potential harm, including structural and garden damage.

2. Preventing Yard Flooding

In spring, as temperatures rise, snow melts swiftly, resulting in a substantial amount of water flowing from your roof. This can flood your yard, especially if your regular drainage system struggles with a sudden rush of water, especially during heavy rains.

To address this, you need a system that can collect and efficiently drain water. Installing multiple downspouts in areas that require water drainage makes it easier for water to flow away, preventing yard flooding.

3. Preventing Roof Damage

When snow on your roof melts, it must flow down. If it doesn’t drain correctly, it can pool in different areas on your roof. If it seeps under the shingles and remains stagnant, it can cause extensive damage to your roof, including rotting wood and shingles.

Eavestroughs, especially on sloped roofs, ensure water flows away, allowing your roof to dry out in the sunlight and preventing such disasters.

4. Enhancing Home Protection

Ever noticed a mini waterfall by your front door when it rains? This happens when you lack eavestroughs. Without them, water cascades off the roof’s edge all around your house, creating an unpleasant experience.

Frequently Asked Questions (FAQs)

1. How often should I clean my eavestroughs?

Eavestroughs should be cleaned at least twice a year, typically in the spring and fall. However, the frequency may vary depending on the surrounding trees and the level of debris accumulation.

2. Can eavestroughs help conserve rainwater for gardening?

Yes, eavestroughs can be part of a rainwater harvesting system to collect rainwater for gardening. It’s an eco-friendly way to water plants and reduce water bills.

3. Are there any legal regulations or permits required for eavestrough installation?

Regulations and permit requirements vary by location, so it’s essential to check with your local authorities or building department. In some areas, permits may be necessary for eavestrough installation.

4. Can I retrofit an existing home with an eavestrough system?

Yes, it’s possible to retrofit an existing home with an eavestrough system. A professional installer can assess your home and recommend the best approach for adding eavestroughs while minimizing any potential disruption.

5. What maintenance is required for an eavestrough system?

Regular maintenance is crucial to keep your eavestrough system functioning optimally. This includes cleaning out debris, leaves, and twigs that can clog the channels and downspouts. It’s a good idea to inspect for leaks, rust, or damage and address any issues promptly.

6. How can I prevent ice dams from forming in my eavestroughs?

Ice dams can occur when snow melts, refreezes, and blocks the eavestrough, potentially causing damage. To prevent ice dams, ensure your attic is well-insulated and ventilated to maintain consistent temperatures on the roof. Proper maintenance and the use of heating cables can also help.

7. What should I do if my eavestroughs are overflowing during heavy rains?

Overflowing eavestroughs can be a sign of clogs or improper slope. Start by cleaning out any debris and ensuring the channels have the correct angle for water flow. If the problem persists, consult a professional to identify and address the issue.

8. What materials are eavestroughs typically made of?

Eavestroughs are commonly constructed from various materials, including Aluminum, Copper, Zinc, Steel, and Vinyl. Each material has its own advantages, such as durability and aesthetics, so you can choose the one that best suits your needs.

Conclusion:

Having an eavestrough system from Active Exterior can protect your home from water damage and ensure a safer, cleaner entrance for you and your guests.

Ready to upgrade your home’s exterior with an efficient eavestrough system? Contact Active Exterior today for a consultation and ensure your property stays dry and well-maintained throughout the year. Don’t wait for the next rainstorm to change your home’s exterior – take action now with Active Exterior!